Let's make it clear. This is a post for dummies. There are some others tutorials online but I thought I could write something better focusing on the right details rather than wasting time on a brainless walkthrough. Well… here are my 50¢.
It's since 2008 that I work with the iOS platform and still, when it comes to managing certificates and provisioning profiles within the Developer Portal, I lose my mind. Just like when you start a new bottle of vodka and you cannot remember the entire trip that brought you to the bottom of the previous bottle.
After having read this post you'll hopefully have a better understanding of what and why you need to setup in terms of certificates and provisioning profiles for building an iOS app on device or for archiving for release. If not, at least you have some handy tutorial for dummies.
Let's start from scratch. No keys, no certificates, no provisioning profiles, clean Mac installation.
Everything begins with a CSR
A CSR or Certificate Signing request is a block of encrypted text that is generated on the machine that the certificate will be used on. It contains information that will be included in your certificate such as your organization name, common name (domain name), locality, and country. It also contains the public key that will be included in your certificate. A private key is usually created at the same time of the creation of the CSR.
A certificate authority will use a CSR to create your SSL certificate, but it clearly does not need your private key. You need to keep your private key secret. What is a CSR and private key good for if someone else can potentially read your communications? The certificate created with a particular CSR will only work with the private key that was generated with it. So if you lose the private key, the certificate will no longer work.
To create a CSR, launch the Keychain Access app on Mac OS X and select Keychain Access -> Certificate Assistant -> Request a Certificate From a Certificate Authority
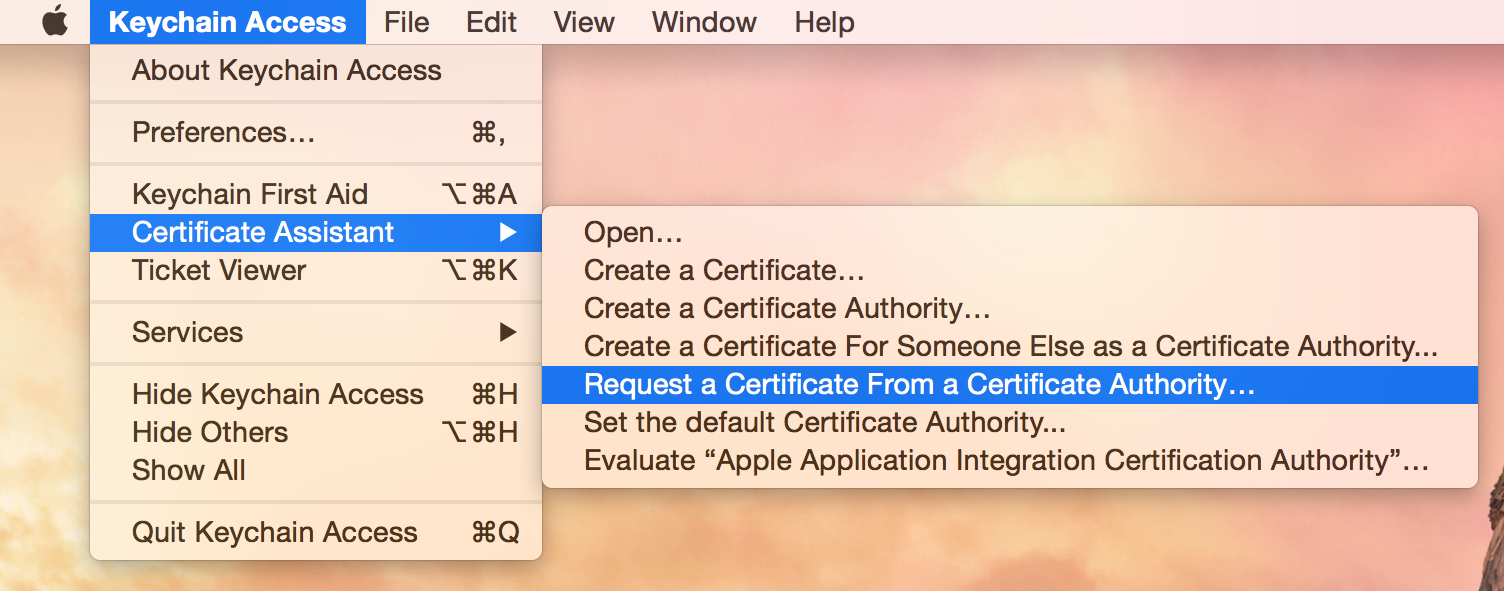
I think the menu title is misleading. We don't actually request a certificate, we are creating a request for it! Create a CSR with common name and a email address. This fields are enough for our purpose.

Now you have the CertificateSigningRequest.certSigningRequest file.
CSRs are created in the Base-64 encoded PEM format. This format includes the -----BEGIN CERTIFICATE REQUEST----- and -----END CERTIFICATE REQUEST----- lines at the beginning and end of the CSR. A PEM format CSR can be opened in a text editor and looks like the following example:
-----BEGIN CERTIFICATE REQUEST-----
MIIByjCCATMCAQAwgYkxCzAJBgNVBAYTAlVTMRMwEQYDVQQIEwpDYWxpZm9ybmlh
MRYwFAYDVQQHEw1Nb3VudGFpbiBWaWV3MRMwEQYDVQQKEwpHb29nbGUgSW5jMR8w
HQYDVQQLExZJbmZvcm1hdGlvbiBUZWNobm9sb2d5MRcwFQYDVQQDEw53d3cuZ29v
Z2xlLmNvbTCBnzANBgkqhkiG9w0BAQEFAAOBjQAwgYkCgYEApZtYJCHJ4VpVXHfV
IlstQTlO4qC03hjX+ZkPyvdYd1Q4+qbAeTwXmCUKYHThVRd5aXSqlPzyIBwieMZr
WFlRQddZ1IzXAlVRDWwAo60KecqeAXnnUK+5fXoTI/UgWshre8tJ+x/TMHaQKR/J
cIWPhqaQhsJuzZbvAdGA80BLxdMCAwEAAaAAMA0GCSqGSIb3DQEBBQUAA4GBAIhl
4PvFq+e7ipARgI5ZM+GZx6mpCz44DTo0JkwfRDf+BtrsaC0q68eTf2XhYOsq4fkH
Q0uA0aVog3f5iJxCa3Hp5gxbJQ6zV6kJ0TEsuaaOhEko9sdpCoPOnRBm2i/XRD2D
6iNh8f8z0ShGsFqjDgFHyF3o+lUyj+UC6H1QW7bn
-----END CERTIFICATE REQUEST-----
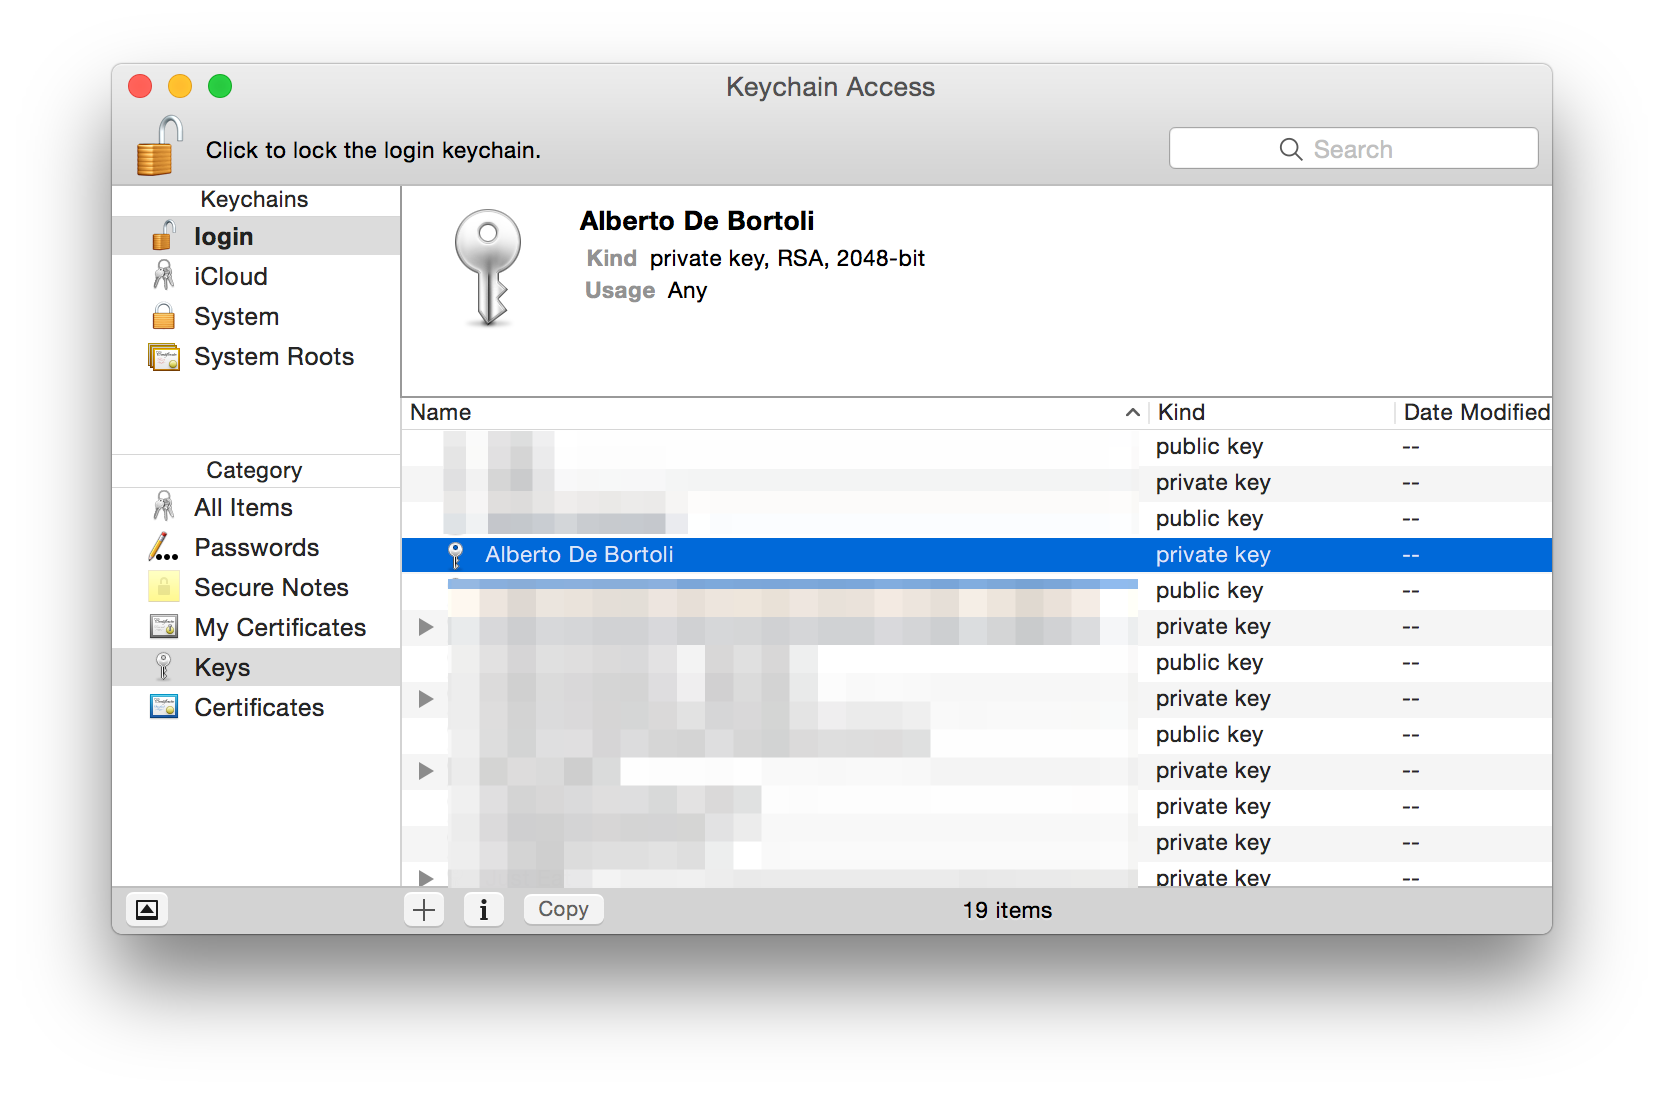
Now in the Keychain Access are also visible the new keys created along with the CSR. They will be 2048-bit by default. The name of the public/private keys is the common name chosen previously. There is nothing linked to these keys yet. These keys are super important data. If you lose them, everything we are about to create will be fuc*ed up.
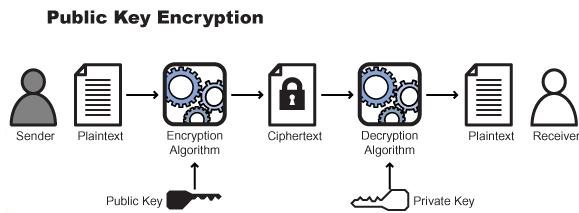
Public and Private Keys
If you missed that lesson about RSA at your Computer Science class, what you need to know is basically:
- RSA is an algorithm invented by Rivest, Shamir, Adleman to encrypt data in a secure way;
- It involves 2 keys: the public one can be shared with anyone, the private one must be kept secret;
- It's secure, depending on the length of the keys (in bits, usually 2048 for our purposes, military grade), since it relies on strong math theorems such as Fermat's little theorem and the factoring problem (the difficulty of factoring the product of two large prime numbers);
- In-depth explanation here;
- The following flow diagram should be self-explanatory.
Certificates, Identifiers & Profiles
It's time to go to the Developer Portal and create some stuff.
Sections are Development and Production. Let's go through the steps for creating the development certificate (similar steps apply for production).
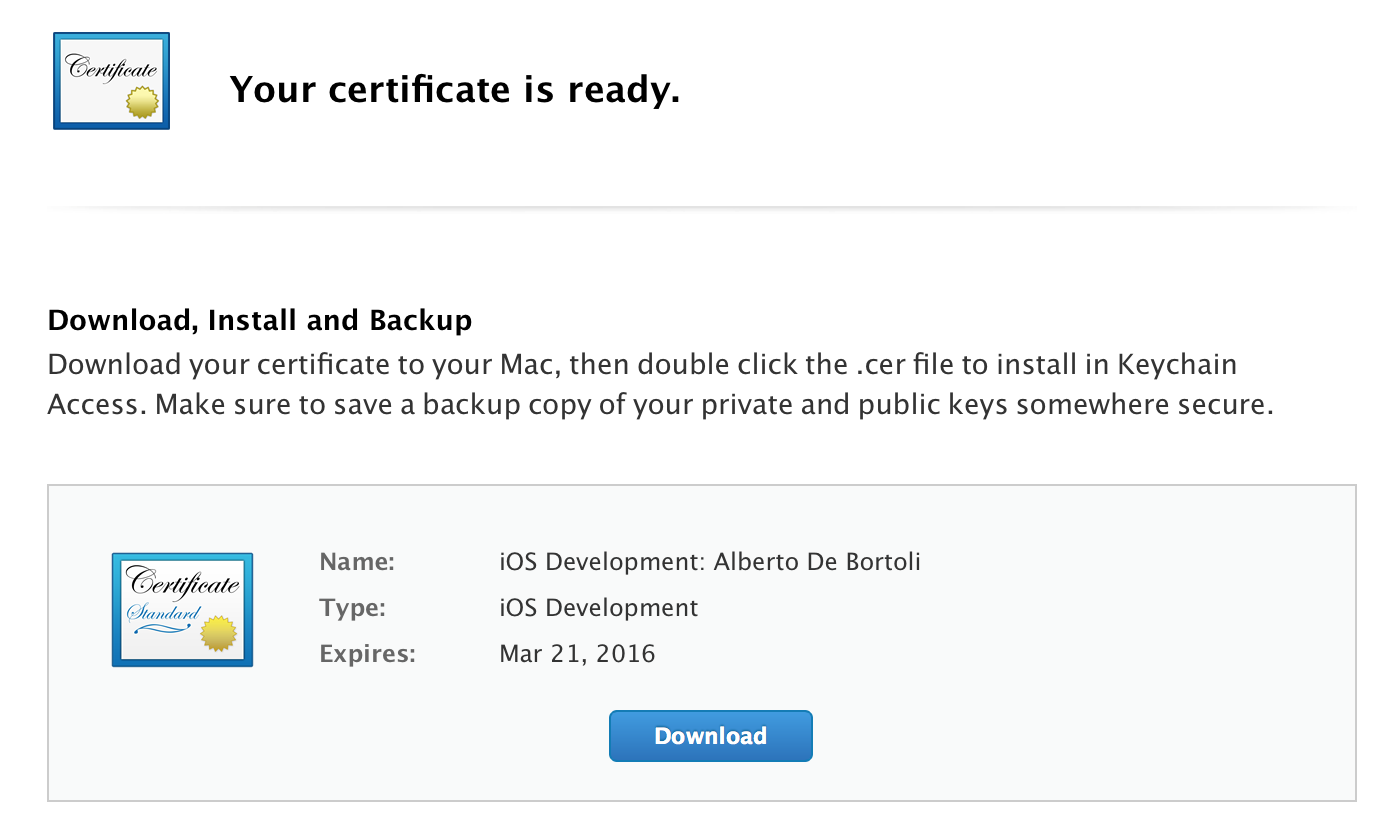
Let's pick "iOS App Development". You'll be asked to submit the CSR. Download the certificate, it'll be named ios_development.cer.
When you install it, it will appear in the Keychain Access with an ID (the so-called Identity) in parenthesis like so:
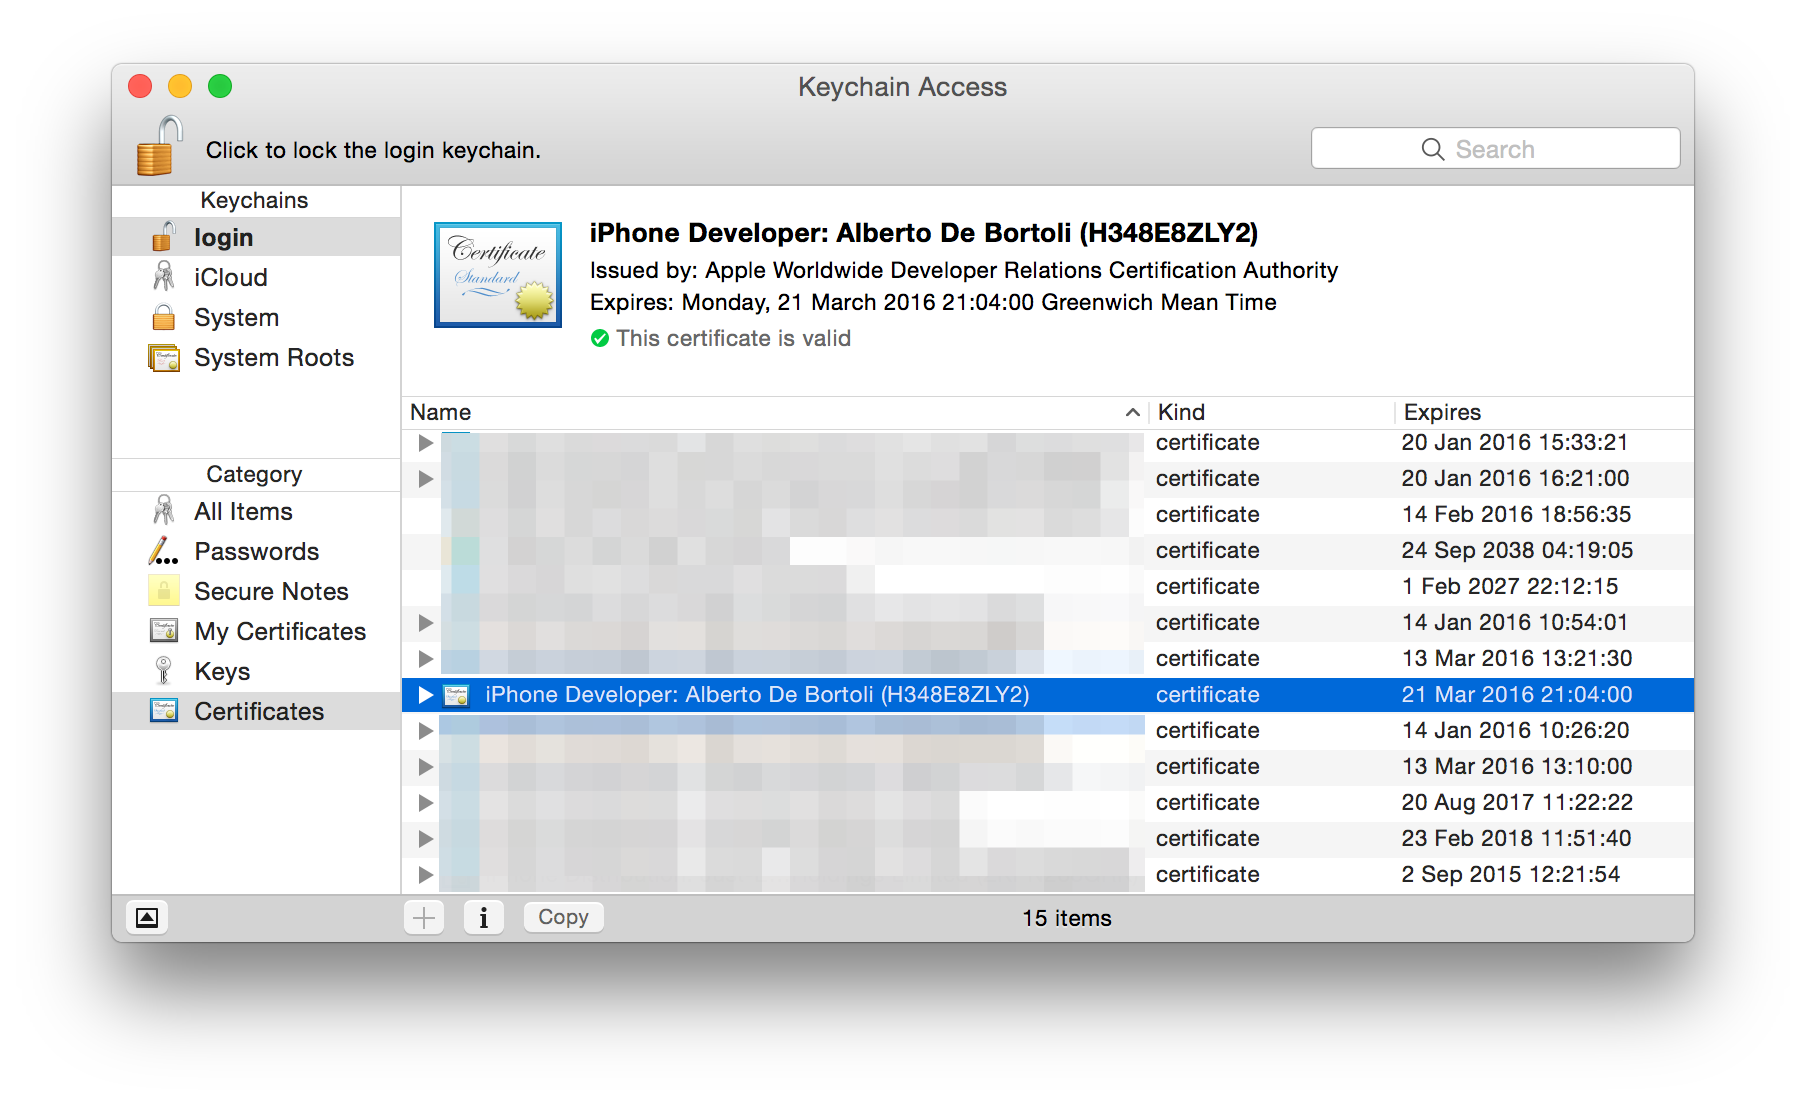
The name is the one of the Developer Program license, not to be confused with the one you set when creating the CSR. The certificate has been created for you and encrypted with the public key you sent with the CSR. Your machine can decrypt it since it has the private key. Now in the Keychain Access you'll have the certificate combined with the private key.

and the other way around

If you want to export the whole thing to another machine, select the couple and export.

Pick a password and you'll get a Certificates.p12.
If interested in the certificate info, select info from the drop down menu. It has been issued by an Apple CA (Certification Authority) and it includes the public key.
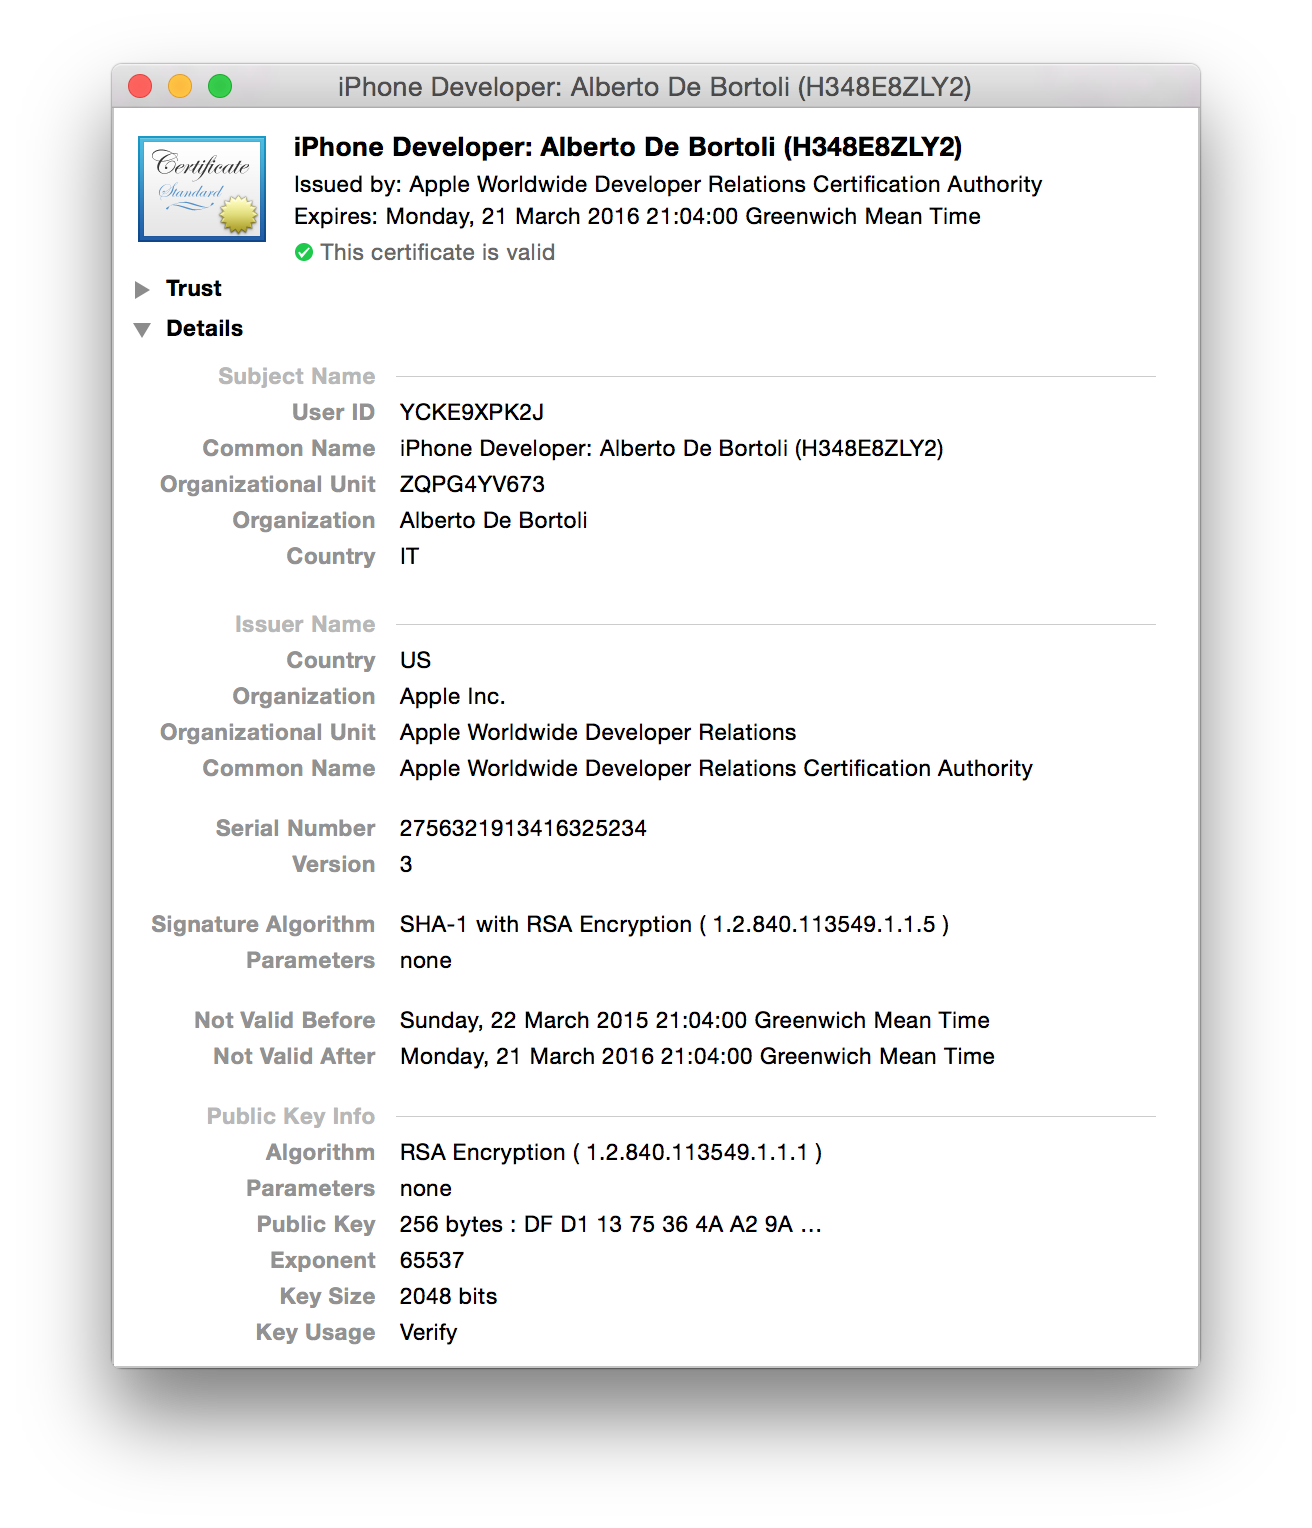
At its core an X.509 certificate is a digital document that has been encoded and/or digitally signed according to RFC 5280. In the X.509 system, a certification authority issues a certificate binding a public key to a particular distinguished name.
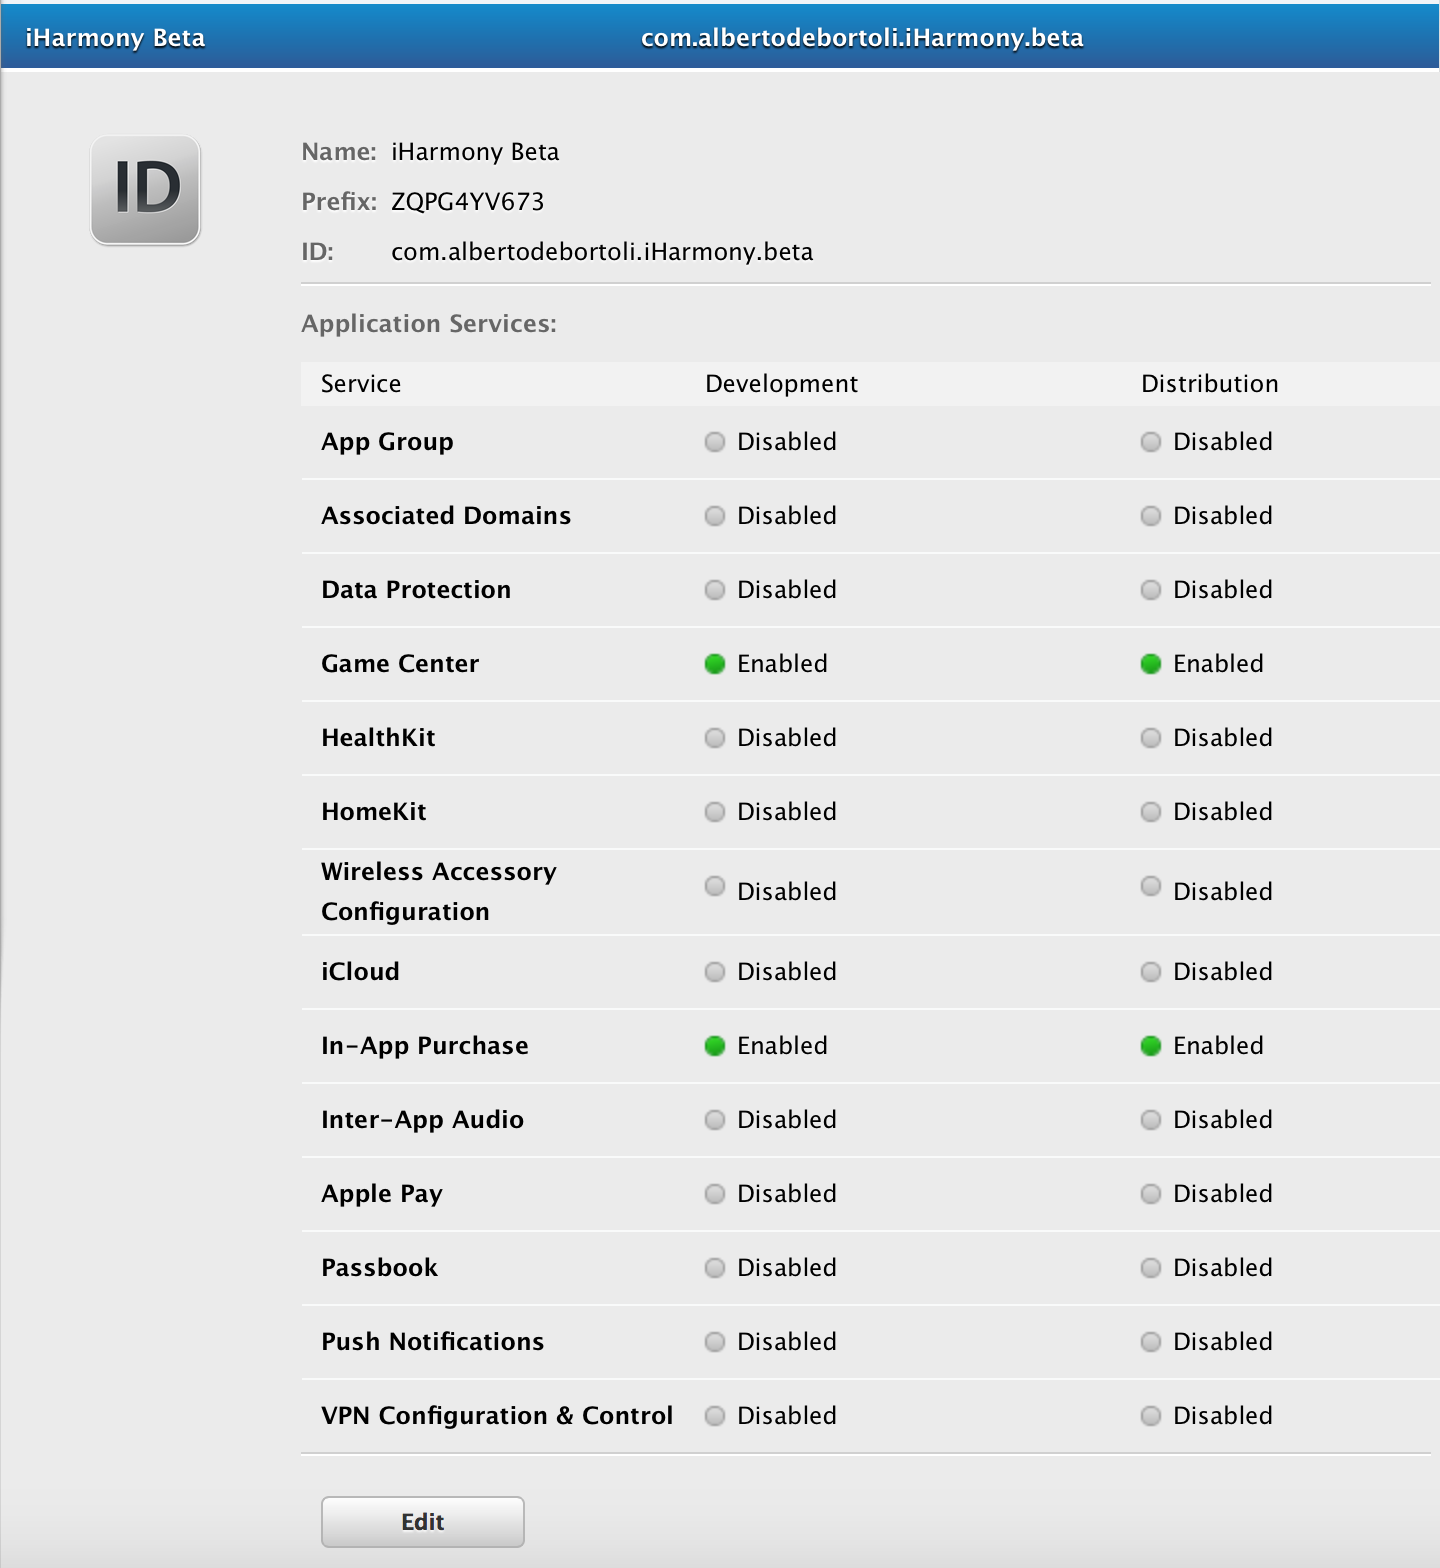
Now it's time to create an App ID. Nothing too fancy here if you stick to the rule:
One App ID per App
Try to avoid wildcard to match multiple apps. It hurts when you decide to add App Services (like Push Notifications) later on. Insert the Bundle ID of your app. I usually stick to this reverse domain schema com.yourdomain.yourapp.buildtype (e.g. com.albertodebortoli.iHarmony.beta).
At the very basic, you get something like so:
Time to create a Provisioning Profile: it's something that allows your application to run on your devices. It is a collection of your iOS Development Certificate, UDID and your App Id. Without a provisioning profile you cannot install your apps on your development devices.
Here sections are, one more time, Development and Production, like it was for the certificates.
Let's go for through the Development flow. Select 'iOS App Development'. Select the App ID just created, select the devices you want to enable (if it's a development provisioning profile), link the certificate previously generated that will be included in the Provisioning Profile and pick a name for it. I usually stick with this schema <App Name> <Build Type> <Date of PP generation> <Environment Type> PP.
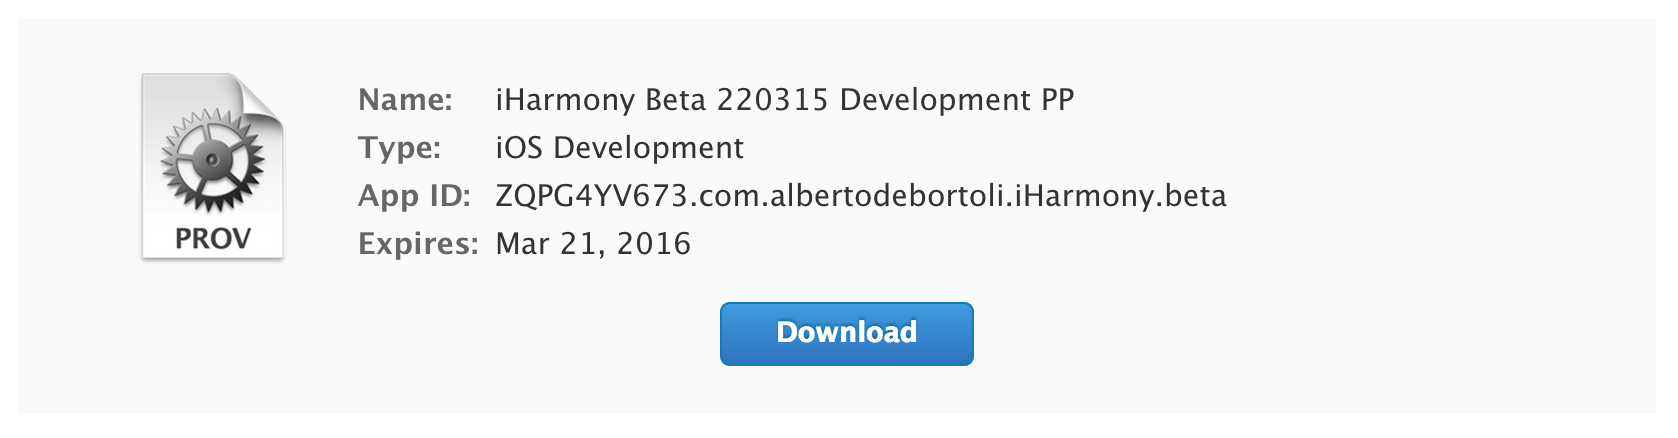
Download and install it. It's named something like iHarmony_Beta_220315_Development_PP.mobileprovision.
The project
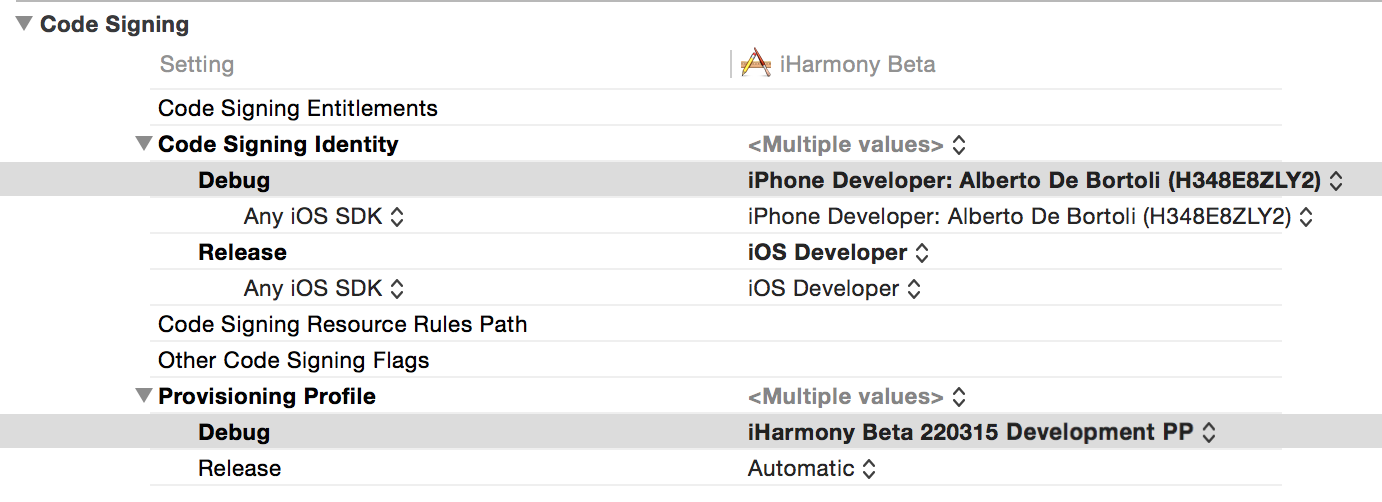
Create a new Xcode project. Set the bundle id to the one picked previously. Go to Build Settings and filter for "code signing".
Set the values "Code Signing Identity" (the certificate) and "Provisioning Profile" (the provisioning profile) like so:
Make sure you have setup the correct Bundle ID in the Info.plist file. When a new project is created it has something like com.albertodebortoli.iHarmony.beta.$(PRODUCT_NAME:rfc1034identifier), you might want to remove the last part and prefer having an explicit string to avoid the following error in the General pane of your target (you might need to restart/play around with Xcode to make it get the change).

If you already are part of other teams (i.e. different Developer Program Licenses), you have to pick the right one. Now you should be able to build on device and (if you've done the same step for Production) archive for App Store/Ad Hoc Distribution.
Some key points
-
When you create a CSR within the Keychain Access the keys are generated automatically for you.
-
You can reuse the same CSR for generating different certificates or if some certificate is revoked. It's fine to have just one single public/private key pair for all the things related to a specific domain. Differently, when generating certificates for other services (like the push notifications) you might want to use a different key pair.
-
Everything can be regenerated. Always. You revoked some certificates and the CTO of your company got the mail stating “Your certificate has been revoked”? No worries, your business is still alive and the apps on the App Store are still valid.
-
Revoking a certificate used for signing apps distributed with an enterprise license will cause the app not to be valid anymore.
-
If you delete a Provisioning Profile, it can be regenerated using the same certificate.
-
If you lose/delete your private key, the certificate becomes invalid because you don't have a public/private key pair anymore. Therefore the provisioning profile containing the certificate cannot be used anymore.
-
The public/private key can be regenerated too, but you probably want to avoid this step and keep them between certificate/provisioning profiles regenerations. This means that you might want to store the CSR safely otherwise the next time around you'll have to Generate a certificate signing request (CSR) for an existing private key.
-
To pass all the data necessary to build your app to another machine you need to either:
- export the private key and the certificate and download the provisioning profile from the Developer Portal.
- export the private key, download the certificate and provisioning profile from the Developer Portal.
There is so much more to say about code signing and especially about the errors and the headaches you get from it. Apple created some great documentation over the last 7 years.
